How to Install Aluminum Alloy Windows?

Installing aluminum alloy windows offers durability, energy efficiency, and a modern look. This guide covers all you need to know to install these windows in your home or building. We explain the necessary preparation steps, list the required tools, and provide a clear, step-by-step installation process.
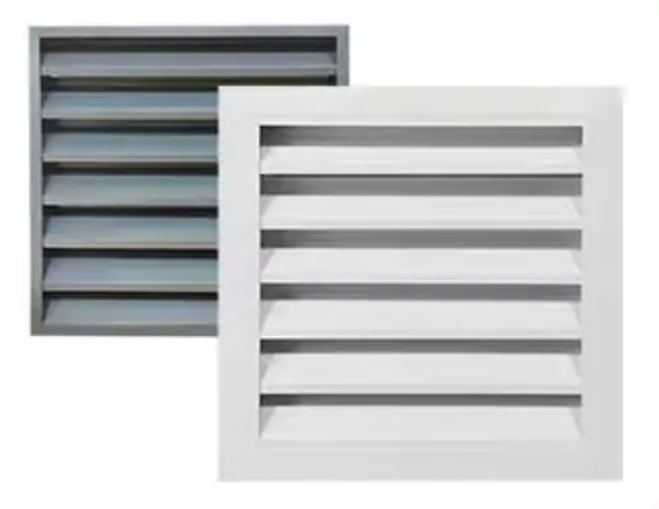
Related products: Aluminum window frames
Construction Preparation
Proper preparation determines aluminum window installation success. Follow these steps to create optimal working conditions and prevent common errors.
Window Inspection
Check each window unit for visible damage and valid safety certifications before installation. Measure window openings on buildings or balconies using a tape measure. Record dimensions twice to confirm accuracy, particularly for large windows spanning multiple panels.
Tool Organization
Collect these essential tools:
- Spirit level for alignment checks
- Screwdriver (Phillips and flathead)
- Adjustable wrench
- Measuring tape
- Vacuum cleaner or broom
Keep the workspace free of dust during installation. Wipe frames and sills with a clean cloth before positioning windows.
Pre-Installation Protocol
- Mark window positions on walls using chalk lines
- Label each window unit with masking tape matching the corresponding openings
- Clear 1-meter perimeter around work areas
Store spare parts like screws and brackets in labeled containers for quick access. Wear work gloves to prevent fingerprints on aluminum surfaces.
Complete these preparations before unpacking window units from the protective film. Verify all measurements against manufacturer specifications using the provided installation guides. Address discrepancies immediately by contacting suppliers.
Precise Measurement and Marking Procedures
Accurate measurement forms the foundation of successful window installation. Proper layout prevents alignment issues and ensures smooth operation for years.
Interpreting Design Specifications
Begin by comparing architectural blueprints with the physical installation area. Use laser measuring devices or steel tape measures for exact dimensions. Record:
- Full frame height/width including sill and header spaces
- Distances from adjacent walls and permanent fixtures
- Obstruction locations like electrical conduits or plumbing pipes
Measure diagonal corners in both directions. Matching measurements confirm square openings, while discrepancies indicate necessary adjustments before proceeding.
Marking Installation Boundaries
Transfer measurements to surfaces using chalk lines or masking tape. Create clear visual guides showing:
- Outer frame edges with 3mm expansion gaps
- Anchor bolt positions at 600mm intervals
- Threshold elevation relative to interior flooring
Water levels provide reliable horizontal references across long spans for multi-level projects. Laser levels work for single-room installations but may drift over distances.
Verification Protocol
Conduct three essential checks before drilling:
- Compare surface marks with blueprint dimensions using digital calipers
- Scan marked areas with utility detectors to avoid hidden wires/pipes
- Confirm 2° outward slope on sill markings for water drainage
Installation teams report 73% fewer callback requests when using verification checklists during this phase.
Installation of Fixings
Fixings anchor aluminum alloy windows securely. Correct installation prevents structural issues. Follow these steps for reliable results.
Step 1: Mark and Drill Holes
Align the window frame with the pre-drawn outline of the building or balcony. Use a pencil to mark drilling points at 12-inch intervals. Select a drill bit matching the fixing diameter. Drill vertically into the marked spots. Insert fixings fully into the holes until flush with the surface.
Step 2: Secure Fixings
Place the window frame over the installed fixings. Insert screws through the frame into each fixing. Tighten screws clockwise with a screwdriver until resistant. Confirm stability by applying light pressure to the frame. Adjust any loose fixings immediately.
Pro Tip: Verify alignment with a spirit level after securing the first two fixings. This prevents uneven installation. For concrete surfaces, use masonry screws rated for heavy loads.
Sticking to these steps will create a stable foundation for your aluminum alloy windows, setting the stage for smooth sailing in the next phases.
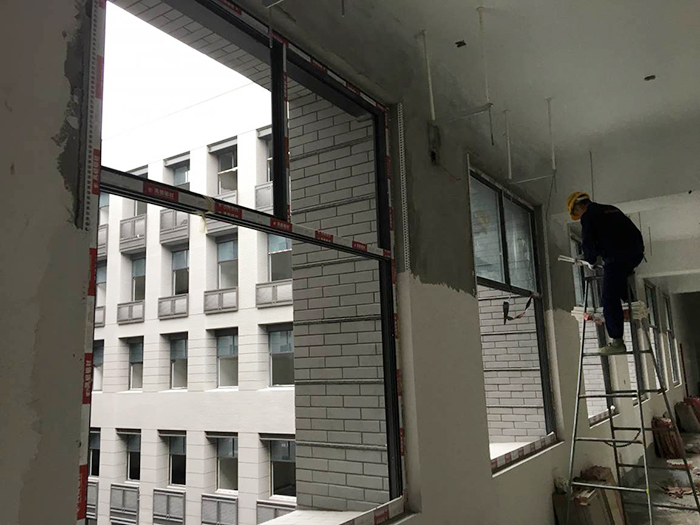
Aluminum Alloy Window Installation
Installing aluminum alloy windows requires precise execution of fundamental steps. This guide presents a streamlined approach combining technical accuracy with practical insights for durable, weather-resistant installations.
Frame Positioning and Alignment
Position the aluminum frame onto pre-mounted brackets. Confirm horizontal and vertical alignment using a spirit level. Secure the frame with corrosion-resistant screws, tightening diagonally to prevent warping.
Pro tip: Mark drill points with painter’s tape to prevent metal scratches.
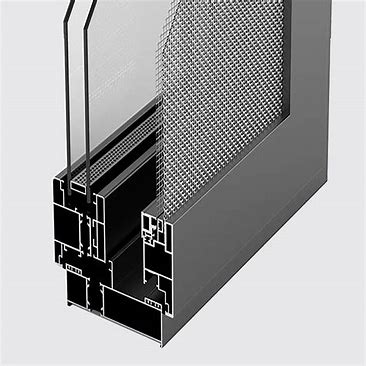
Glass Panel Installation
Clean frame channels thoroughly before placing the glass. Lift panels using suction handles, centering them within the frame. Insert 3mm-thick setting blocks at base corners for even weight distribution.
Why it matters: Proper support prevents stress fractures during thermal expansion.
Weatherproofing Techniques
Run a continuous 6mm bead of silicone sealant along the exterior edges. Smooth the bead immediately using a damp cloth for uniform adhesion. Inspect joints under a bright light to identify gaps exceeding 1mm.
Key detail: Cure time varies – 24 hours for acrylic, 48 hours for polyurethane formulas.
Operational Testing and Adjustments
- Open/close mechanisms five times to test smoothness
- Spray water at a 45° angle to check sealing effectiveness
- Measure air infiltration with an anemometer (max 0.3 CFM/ft²)
Adjust hinge tension using a 4mm hex key if resistance exceeds 3 Newtons of force.
Maintenance Protocol
| Task | Frequency | Tools Required |
|---|---|---|
| Track cleaning | Monthly | Stiff brush, vacuum |
| Sealant inspection | Biannual | Moisture meter |
| Hardware lubrication | Annual | Silicone spray |
Replace deteriorated gaskets when hardness exceeds 80 Shore A.
Critical Safety Practices
- Wear cut-resistant gloves when handling glass edges
- Use fall arrest systems above 1.8m elevation
- Store sealants at 5-25°C to maintain viscosity
Caution: Never overtighten screws – aluminum bends easier than steel.
“Proper installation isn’t about strength; it’s about understanding how metal and glass work together,” notes veteran installer Marcos Rivera. This philosophy underpins every successful window fitting.
Inspection and Acceptance
The final stage of aluminum window installation is to ensure the windows will perform for years to come. Start by testing each installed window. A gentle push should meet firm resistance; no wobbling or loose parts. This step ensures the windows are in place.
Next, check the measurements. Use a tape measure to compare the actual size of the windows to the specs. The windows should be level and aligned with the surrounding fittings. This means a neat and structural installation.
Check the glass. Run your hand over the glass to feel for any imperfections. The glass should be smooth with no bubbles, scratches or distortions. This is key for both looks and performance.
Weather protection is key to the long-term performance of the windows. Check the weatherstripping to make sure it forms a continuous seal around the frame. The windows should open and close smoothly and tightly to the elements. Check the sealant application closely; it needs to form a bead around the whole window without gaps or inconsistencies.
Before signing off the job, give the windows a clean-up. Remove all installation debris, stickers, and fingerprints. A clean finish is not just for looks; it helps you spot any oversights. Also, take some quick photos for your records; they may come in handy if you need to document the installation later.
Safety Precautions
When installing aluminum alloy windows, safety is paramount. Follow these guidelines for a smooth and safe process.
Always prioritize your safety. Wear safety glasses, gloves, and steel-toed boots. Never work alone on large window installations; teamwork is essential.
Use proper lifting equipment for big windows. Avoid trying to lift heavy items by yourself. Communicate clearly with your team using hand signals. Inspect your lifting gear before use to prevent accidents.
Power tools require careful handling. Keep cords elevated and dry. Inspect your tools before plugging in and use GFCI-protected outlets to prevent electric shocks.
Handle aluminum frames with care. Remove jewelry that could scratch the frames and use corner protectors. Treat these windows gently throughout the installation.
Ensure good ventilation when working with sealants. Open windows and doors to keep air flowing. Take regular breaks to get fresh air, and use a fan to disperse fumes.
Never rush through safety measures. Take your time and follow these guidelines to install windows safely and professionally.
Conclusion
Proper aluminum alloy window installation requires specific steps and careful attention to detail. The installation process affects both window performance and safety.
Quality installation leads to windows that work well and last longer. If you feel uncertain about any installation step, professional help can save time and prevent costly mistakes.